With DashProJr, you can define ignition timing as a function of engine rpm. The KLXCDI implements two ignition maps, called the "Main ignition map" and "Alternate ignition map". Which one is used by the KLXCDI at a given moment depends on whether you have the dummy plug or the short connected to the two pin miniature sealed connector at the end of the flying cable.
To change the ignition timing, from the main window, click on one of the two buttons labelled "Main ignition map" and "Alt. ignition map". This will bring you in the "Map Editor Window", shown here:
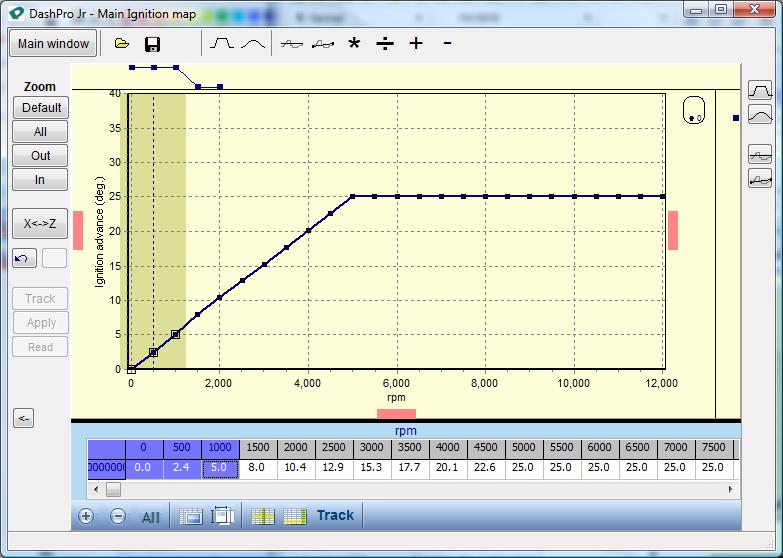
When it first opens, the map editor contains a curve where all points are set at zero. You can then perform the following operations, in any order:
- read the map that is stored in the CDI by clicking button "Read" (enabled only when DashProJr is communicating with the CDI);
- make changes to the timing curve (see topic Working with the map editor for that);
- click the "Apply" button to program the CDI with the timing curve you have on screen (enabled only when DashProJr is communicating with the CDI);
- load a timing curve from a file by clicking on the folder icon button at top left of the window;
- save the current timing curve to a file with the button having a disk icon, also at top of the window.
Note: even though you can set values of timing advance for all rpm down to zero, the KLXCDI uses fixed values for 0 to 500 rpm to avoid starting problems. Reading back the timing values from the cdi reflects those fixed values at low rpm.
See also
Getting Started, which also shows the main DashProJr window.
Working with the map editor, which explains how to manipulate the timing curve with keyboard and mouse operations.
Configuring the KLXCDI, which shows how to change the ignition cutoff rpm and other parameters.