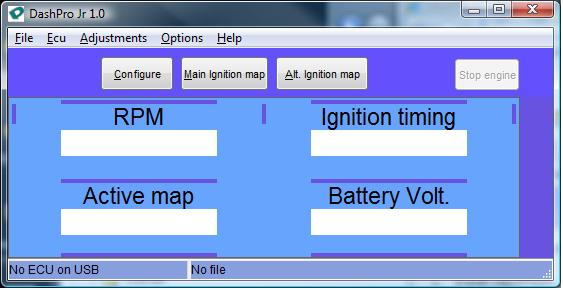
It is recommended to follow these steps the first time you use DashProJr along with the PCLink interface:
- Install DashProJr on your PC if this is not already done;
- Connect the PCLink interface to a USB port on your computer. Windows will show a message that it found new hardware and is looking for the drivers to use it. It will automatically find the correct one in its driver database and install it for you. It will show that your device is ready to use after a few seconds;
- Start DashProJr. The main screen will appear

- Connect the PCLink interface to your PaRay KLXCDI module;
- Turn the ignition key ON so as to power the KLXCDI module, as evidenced by its led pilot lamp lighting on or blinking. DashProJr main screen should show a blinking green dot at the upper right and the white rectangles should fill with values.
DashProJr shows you that it is communicating with the KLXCDI with a blinking green dot and also by identifying the connected device at the bottom left. A typical identification string is "KLXCDI R1V1 on USB". Failure to get correct communications must be investigated at this point before attempting further operations with the system.
Note: next time you use the system, you can do steps 3, 4 and 5 above in any order.
Next: Configuring the KLXCDI